Wednesday 2 May 2012

Marble Nails

Just before exam time, in an effort to do anything rather than revise, I have discovered marbling with nail paints. There are loads and loads of tutorials on youtube, but you often have to put up with annoying voices and they're often very slow.
So, here's my version:


1. Prepare a plastic cup with room-temperature water. 
The cup should be quite small, about the length of an index finger and circumference of the ring you can make with middle finger and thumb. It should be disposable. The little plastic containers in which you get M&S puddings in are ideal, but any cup will do the trick.

2. Prep. your fingers.
This is a messy job so there are two ways to try to minimise the clean-up job.
The first is to cover the tip of your finger (from just under the top joint to the top of the finger) with sellotape. I used two strips: one to wrap round the joint and above (getting as close to the cuticle as possible) and the other to go from one side of the nail bed, to the other and covering the tip of the finger just under the nail.
The second way is to use Vaseline. This makes the clean-up job harder, but means you don't run the risk of sticking fingers together, ruining your design with tape etc. Cover the whole of the top of the finger (not the nail) with the jelly, it's that simple.
Both techniques should be done on only one hand at a time.

3. Choose your colours. 
Anything goes. 

4. Paint a base coat and an under-colour.
A base coat will protect your natural nails a little bit and give a smooth surface in which to work. Then, paint another coat of a coloured polish for the base colour. White is most commonly used, but pale pink or a colour used in your design is also great. Experimentation is key.

5. Marble!
After allowing your nails to completely dry, it's time to start creating. Arm yourself with cocktail sticks, cotton buds, nail polish remover (most convenient in a little pot) and kitchen paper and unscrew all the tops of the nail polishes you're using.
Drip a single drop of your first colour onto the surface of the water and allow it to spread (some are quicker than others but should take no more than about 5 seconds, if it needs help, gentle blowing on the polish or slightly moving the cup might help) Then drip your second colour inside the first. Continue with as many colours or repeat colours as you like until you get rings of polish that you like the look of. (Don't take too long or the polish will dry out)
Get a cocktail stick and create a pattern (you can pull the polish in from the very edges to make a flower, out from the centre to create a star, or just swirl it around randomly until you get a pattern you like. 

5. Capture the design.
Choose the section you like and how to orientate it on the nail. Then, dip the your finger in so that the nail is parallel to the surface of the water and then leave your finger under the water and clean the film off the surface. The easiest way to so this is to spin and swirl a cotton bud around in the water and let it pick up all the remaining polish on the surface. Then, remove your finger. 

Do steps 4 and 5 for all nails, if using sellotape, remove it when the polish is dry. 

6. Clean-Up.
The worst part. Take some cotton buds and soak them in nail polish remover (this is where the little pot is helpful) Rub off any excess polish around the nail (a lot harder having used Vaseline rather than sellotape) 

7. Top Coat.
Always top coat your design to protect it and add shine.

8. Rectify.
If there are any parts of the patten which need more detail, or the nails become chipped at any point, you can fill in gaps with a nail art pen.

DONE!

Shown below are the designs I created using the following polishes:
No.7 top coat and base coat
Barry M Silver Foil Effects 319 for under coat and in design
KIKO Nail Lacquer 338
17 Lasting Fix in Fairy Cake
No.7 Betty Blues 280


More designs to follow soon!

Tuesday 1 May 2012

On This Day

On the 30th April 1994, Roland Ratzenberger died during qualifying for the San Marino Grand Prix.
On the 1st May 1994, Ayrton Senna died at the Imola circuit while leading the San Marino Grand Prix.

The Formula One we watch today is largely a result of these two legendary drivers. While Senna is the most famous, Ratzenberger was just as influential in the implementation of new safety measures and the re-formation of the Grand Prix Drivers' Association. While Formula One has always been at the very fore-front of technological innovation, the safety advances in the last 18 years have meant that there has not been a fatal accident for a driver in F1 since Senna's. Professor Sid Watkins, Senna's closest friend on-track helped very much in these safety transformations which include redesigned tracks, improved crash barriers and higher safety standards on the cars themselves.

Perhaps the most touching thing about this tragic weekend was the small furled Austrian flag that nurses at the hospital found hidden in the sleeve of Senna's driving overalls. We can conclude that he had intended to fly it from his cockpit after the race in order to dedicate the race to the memory of Roland Ratzenberger. Instead, millions of people lined the streets of Sao Paulo in order to commemorate Senna and collectively mourn his death, which many regarded as not only a personal tragedy, but a national loss.

On May Day, I seek to celebrate the differences that these two drivers made to their sport. It has been said that no better death could be imagined for racing drivers than doing what they love best. I, for one, cannot imagine Senna's death being broadcast over the news after a long battle with disease or illness. As it is, their contribution to the world of F1 is still very apparent today, as is the respect from every motor sport fan.

Saturday 28 April 2012

Would've been nice..


£502 return on a £2 bet, gotta be worth it right? Sadly, the horse came fourth.

Monday 16 April 2012

Utensil Pen Lids

Just a quick post to say how cool are these!?


Pen lids shaped like cutlery for a quick lunch at school or in the office. Brilliant idea!

Sunday 25 March 2012

Formula 1 2012 Season Analysis (so far)


So, we're up and running after two races from the 2012 season of Formula 1 with Alonso leading the driver's championship, only 5 points ahead of Hamilton who has 30 points. 3rd and 4th is very close with Button and Webber with only one point between them, 25 and 24 points respectively. Perez is 5th after his brilliant performance in Malaysia and Vettel is running 6th after withdrawing from the race today in the final lap. I'm enjoying the BBC production although I was devastated that only Sky would be showing all races on full this year.

This season, a quarter of the grid are former F1 World Champions. The racing has been dynamic and exciting, especially during the race at Sepang where it seemed tactics were everything. Jenson Button destroyed his front wing in a collision with Narain Karthikeyan and Vettel finished out of the points! (A fact I am secretly loving.)  Hamilton, my favourite driver, has had both pole positions after the qualifying sessions but has failed to convert either into a win and has come 3rd in both races. Michael Schumacher (wow, that doesn't come up as mis-spelled - shows how fantastic and well known this guy is. Grew up hearing his name almost every Sunday, he's my second favourite) still managed to pick up a point this race after a devastating spin in the early stages of the race, seems he still could be "the rain master". Romain Grosjean is a very exciting prospect at Lotus. He qualified 3rd in Australia but fell to sixth at the start and retired after a collision with Maldonado on the second lap which broke his front-right suspension. In Malaysia he was in Q3 again and started P6. He got off the line brilliantly with a really effective use of KERS, overtaking both the red bulls and Schumacher to get third place after the first corner. Unfortunately, after the collision with Schumacher, Grosjean spun again, ending up in the gravel and withdrawing again in the first few laps of the race.

A brilliant race by Perez allowed him to finish 2nd, even challenging the World Champion Alonso at points for pole. Alonso won well however, assisted by Ferrari's amazing sub-3-seconds pit stops. Tyre choices were all important in the really difficult conditions this week with some really interesting tactical decisions made during the race. Looking forward to more action in China :D

Thursday 8 March 2012

Chanel Illusions D'Ombre


In Autumn 2011, CHANEL released their Collection Illusions D'Ombres: a six colour range of long wear luminous eyeshadows. These creamy eyeshadows are absolutely brilliant. The pot is big for an eyeshadow and a tiny amount of it will go so far with a brilliant effect. The glitter particles are absolutely tiny and won't cause problems for even the most sensitive eyes, this also means that the shadow glides on smoothly and cleanly without bunching. The shadow has a creamy texture in the pot and on the brush but smoothes into a powdery finish when applied. It stays put for hours on end without creasing or smudging, it's the best eyeshadow I've ever used and well-worth the price-tag of  £22.50. The only bad point of these is the brush. Although it is very fine and nice to use, I find a sponge much easier to use and the loose brush just gets lost at the bottom of the makeup bag. I got over this problem pretty sharpish though because this product is simply amazing.

I like to wear the white (Fantasme) or black (Mirifique) on alone with false eyelashes, or use them both together to create a tonal effect with white on the inside, it makes you look awake, and black on the outside to give depth to the eyes. I then use a lip brush (yes, I know..) to draw a thin line of matt black shadow on my bottom lashes, joining up to the top shadow with a slight flick. Both are spectacularly sparkly and using them together produces quite an extreme, stylised look, perfect for a night out.
I often use Mirifique with a plain silver or blue eyeshadow to create a similar result for everyday wear without less glitter impact.

Another favourite is the purple one, Illusoire. This works brilliantly used on it's own or with pink, violet or brown shadows such as the Chanel Stylo Yeux Waterproof eyeliner in 40 Violine or the Chanel Eyeshadow Les 4 Ombres quad in 19 Enigma.

The greeny gold Epitant is very nice used just to sweep across the top lid when wearing gold/brown/green clothes. Combine with a liquid black liner to create a slick look with luminous shine.

The peach, Emerveille is a lot more subtle than the rest with gold/bronze reflections. It's perfect to use when you're going for a more natural but styled look as it has a mother-of-pearl sheen to it and is just stunning. Combine with a lengthening mascara such as No.7 Extreme Length in black and go for some peach/pink lips. Chanel's Rouge Coco Shine in Chance goes perfectly.

The red, Ebloui, is in my opinion very difficult to wear and therefore the only one I wouldn't have in my makeup collection. It's ruby/bronze and looks stunning in the pot but with my clothes and skin tone I really cant see it working. Paired with dark red lips, maybe Dragon by Chanel, this would look amazing, especially for those with darker skin and eyes.


Sunday 19 February 2012

Bellapierre Mineral Make-Up


Mineral make-up has become more and more successful over the past few years and Bellapierre is one of the fastest growing mineral make-up companies in the world. It boasts 100% natural mineral cosmetics across the range and is suitable for any skin-type, even the most sensitive. Bellapierre does the make-up for Legally Blonde: the musical in the West End and also many fashion shows, including London Fashion Week, fast becoming a favourite with celebs worldwide.

The really special thing about the Bellapierre range is that you can use clear mascara, lipgloss, lip balm, nail paint etc. from their range and combine it with any of the powder colours to create any colour mascara, lipgloss, lipstick, nail varnish etc. COLOUR COORDINATION HEAVEN for freaks like me :) but the downside is the price, they're rather expensive..


What you're paying for is the mineral without fillers or any bismuth oxychloride which other mineral make-up brands use (often irritating for sensitive skin). Most make-up brands contain fillers in foundations (particularly liquid foundation) which reduce the price for the manufacturer, whether or not that price drop is carried on to the consumer. The Bellapierre foundation contains zinc oxide (renowned as a great ingredient to reduce spots) and has decent coverage, but does tend to go a little orange after a few hours.. It also has quite a hefty price tag of £34.99.


The glitter powder is sooooo sparkly but the particles are quite large for cosmetic glitter and I was slightly worried about my eyes when taking it off. When on it appeared as if a starry sky was under my lashes and a glitterball effect played around the edge of my eyes. It was nice for a change, but I will be sticking to Chanel's Illusion D'Ombre Long Wear Luminous eyeshadows as they are absolutely fantastic! (more on that later) 


The best product in the entire range, in my opinion, is the foundation primer. It is what I'd call a miracle product. Immediately softening and smoothing, this primer can be used as a moisturiser and a base for foundation as it treats dryness, fine lines, excess oil and enlarged pores, making skin feel so soft. Only a teeny tiny bit is needed for full-face application after which a full make-up routine can ensue or, for those lucky people with no blemishes, a light dusting of powder will suffice. This is almost extortionate at £45 per pot, but it is fantastic and lasts around 10 months at a time. 


That's all from me on this brand, if you're looking for slightly less expensive alternatives try: Lily Lolo, Purely Mineral or Earthnicity. (hope everyone likes my little fishpond on the right)
JB

Tuesday 14 February 2012

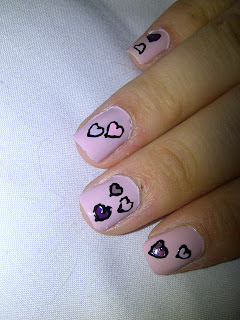
Valentine's Nails


This is the nail art I did for Valentine's Day this year. I chose 17 Lasting Fix in "Sweet Kisses" for the background and after two coats painted on some v shapes in 17 "Royal Indigo", "Woo Me", "Forever", "Fairy Cake", "Revenge" and MaxFactor's "Boji" (easier to do with my right hand on left) followed by outlining each of the shapes with little hearts in the Andrea Fullerton Dot&Flick pen in black (very difficult to draw small heart shapes with left hand!) and added a few extra heart shapes to fill the gaps. 
voilà!

Thursday 9 February 2012

Chanel Camellias

Coco Chanel's love for Camellia blooms is shown through a lot of her collections for both fashion and beauty. We might all with we could pin a Chanel branded camellia on an outfit now and then to smarten up, but at £300 each I for one am going to have to find a cheaper alternative. At my local bead/craft shop I found felt camellias for under £2 each and I could also buy some badge backs at the same time. Going home I stuck the badge backs to the flower backs and voila! Chanel-esque camellia broaches :)

M&S are doing Chanel-esque little heeled sandals at the moment too, complete with leather camellia. At £25 a pair these are good quality shoes with designer lineage for a fraction of the price! Complete the look with a nicely manicured toenail peeping through the front (a Chanel colour will go just great!) These shoes are available in complete purple and black/beige combinations. Nice and comfy too :D


Wednesday 8 February 2012

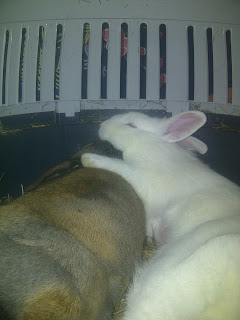
Sleeping Bunny Rabbits

I challenge anyone not to find these pictures cute:


 The brown one is my boy, Monte, he's about 2 years old now and a dutch/rex cross. Such a sweet boy, great temperament.
The fluffy white one is Bella, the little princess. Stubborn and moody but very pretty, she's still less than a year old.
They are utterly in love.


Tuesday 7 February 2012

Nail Art (Post Three)


This purple leopard print was chosen by my brother's girlfriend, Hattie, for me to do on her nails. They worked out really nicely with the polishes looking glossy and professional.

I used a basecoat of 17 Lasting Fix in 'Woo Me', using the three-stroke technique, and then put a few spots of Barry M 'Mushroom' and 'Bright Purple' on each nail and waited for them all to dry. Then using my favourite Andrea Fulerton Nail Art Black Pen, I surrounded each spot with a broken ring and then added a few random swirls to fill the gaps. (Remember to never use a topcoat as it smudges the pens!)

The busy design has worked really well on Hattie's shorter nails here and the colours go surprisingly well together and with many different outfits. Nice work :)


 I got really bored over the weekend and decided to use my Andrea Fulerton Gemstone Overcoat (I know a post solely on this is long overdue). I used Barry M 'Matt White' and painted over the whole of each nail with 2 coats. Then I did a half/half design on each nail using Collection 2000 Lasting Colour in 'Liquorice' which I reflected on the other hand (colours and patterns here were 60's inspired). Was tempted to leave them as they were but to jazz it up a little bit, I covered each nail with some of the Gemstone Overcoat. This makes white nail polish resemble Opal with tiny little flakes of glitter suspended in clear polish. Although it is a dense varnish, it dries quite quickly and reasonably smoothly and, bucking the trend of most glitter polishes, is quite easy to remove. As you can see, on the dark colour, the glitter flakes reflect red and green tones, completely in contrast to the blue and purple colours that show on the white. I prefer the subtlety of the pale colour and will be using this more, but the colours on the black make it really striking. Definitely a good investment at under £5 per bottle from Superdrug!


Friday 3 February 2012

Vintage Nails

Ok, I know this has become more of a nail blog than anything else, but I do get comments on these most of all and they allow me to waste time (and put off homework) without feeling too guilty. Using the Frontcover Nail Polishes I received for Christmas (thanks AJ :D) I decided to create a kinda vintage design for my nails. A square shaped nail suits me a lot better than the typical curved end (not going full-out vintage and going to oval ends) so I chose to do a design which had a bold, dark coloured tip and pale base. I settled on purples for no reason in particular and went for it:


The base colour "Moonrock" is pale purple with gold glitter particles which give it a gorgeous sheen and pearlescent finish. The tip colour "Palevioletred" is a richer purple but with a shimmery finish too. Both are Frontcover nail varnishes and apply brilliantly without streaking and dry quickly. It's all down to personal taste, but I quite like this one :)

Wednesday 1 February 2012

Thank You

Thank you to everyone who helped me to get 510 views last month! I am so grateful to everyone who visited the page, hope you enjoyed reading (or just looking at the pictures), THANKS AGAIN!!

JB

Monday 30 January 2012

Nail Art (Post Two)


A fusion of leopard and tiger print in brown, blue and black.
I really enjoyed doing this nail painting (had a lot of time to spare at the beginning of the week and this is the result) I love the Andrea Fulerton pens, both ends are really useful and I hope to sway away from animal prints soon onto more detailed and difficult designs, but for now they look great and I get a lot of compliments for them. I chose the colours because they go with almost anything and I had no idea of outfits for the rest of the week.

Using the base colour "17 Lasting Fix Nail Polish" in "Forever" I covered each nail with two smooth coats (same three swish system as always) and put a few spots of "Barry M Blue Moon" on some nails. Then, I surrounded each spot with a broken circle of black polish using the nib of the Dot&Flick pen and added a few extra details and splodges to cover the empty spaces. I then decided to test out the other part of the pen (the 'flick' side) which is a very thin and long brush. You have to make sure that this end has just the right amount of paint on to 'flick' properly, but after a disaster on my left thumb I got the knack and painted a tiger print by swishing off each edge of the nail alternately, releasing pressure as I went to create the tapered end. After far less effort than the leopard print, I had a great nail art job!


This is just the tiger print on Emily's nails. It looks great on a bolder background as well as on short nails. Thumbs up (if you'll pardon the pun) for this print all round!

Sunday 29 January 2012

Piece of dried glue selling for £151,600.00 with still 1 day to go?

Homer Simpson Dried Glue Lookalike

A piece of dried glue which happened to form a likeness to Homer Simpson is selling on Ebay right now for over 150 grand..
How?!
I should've kept the many bits that I had from art GCSE, like the paint which dried to look like Jesus (just kidding, but it obviously could have made a fortune!)
Unbelievable, these people (82 bids) must have more money than sense.

Saturday 28 January 2012

Nail Art (Post One)

Grey leopard print:


Instructions:

Starting with Rimmel 60 Seconds in Grey Matter, cover the whole nail with 2 coats. (I start by lining the bottom of the nail, next to the cuticle and getting a nice smooth line, followed by swishing up either side of the nail and a final stroke up the centre to create a smooth finish.) After the base colour has completely dried, put a few spots of; Barry M Blue Moon, Barry M Matt White, and MaxFactor Dazzling Blue on each nail and wait to dry. Then surround each spot with a broken circle, using the nib, in either Andrea Fulerton Dot and Flick "Judy" or "Ruth" to define the pattern and add a few extra markings with the pens to finish. DO NOT use a topcoat as this will smudge the nail art pens no matter how long you leave it. Enjoy! :)

Friday 27 January 2012

M.A.C Tanarama Frost Lipstick


This is one of the strangest lipsticks I've ever worn, although I think Soft Sable from the Glitter & Ice Collection might just take the prize for absolute weirdest lippy. It's a pale gold shimmery lipstick which is quite subtle and best paired with subtle smokey eyes. It lasts quite well and when used with a pale liner (never use a darker lip-liner with it!) can be used as a glittery nude colour. For those with strong coloured lips, it can tone down so other features can stand out for once. The shape with the pointed top is great as well as you can get to thinner parts of the lips and the cupid's bow too. Loving the typical MAC vanilla smell :)

Wednesday 25 January 2012

BMW vs. Audi


One of the best advertisement wars ever:

Audi: 'Your move, BMW'
BMW: 'Checkmate.'
Audi: 'Your pawn is no match for our king'
BMW: 'Game over.'

Tuesday 24 January 2012

M.A.C Glitter & Ice Lipsticks

This collection must be one of the strangest I have ever seen, but you can always rely on MAC to do something a little different. The collection is made up of six limited edition shades named Double Spin,  Such Flare!, What Joy!, Eloquent Air, Whirls & Twirls and Soft Sable in their own white cases. For this review I will focus on the latter three: a bright silver sheer colour, rose-gold shimmer shade and a brown/rosy taupe frost respectively.
(colours from left to right) Double Spin, Whirls & Twirls, Soft Sable, Eloquent Air, Such Flare!, What Joy!

Eloquent Air is a glaze finish, silver shimmered lipstick. The coverage isn't very good so it is better to think of this as an overcoat rather than a base coat just to add a little bit of sparkle. This lipstick has quite a drying texture and wears off within a few hours so will have to be reapplied often to ensure the best effect. The colour works with your natural lip colour to create a fusion between the two which is bound to be successful! 

Whirls & Twirls is a lovely pink colour with a slightly pearly gold shimmer sheen. As it is also a glaze finish, it has similar problems to Eloquent Air but will work fantastically with naturally darker lips or pale skin.

Soft Sable is a very strange colour. I chose it to be my halloween lip colour as the collection came out just before and I found the shade slightly spooky. It's quite an artificial muted brown with silver shimmer and a purple/pink tone. It has a semi-sheer frost shimmer finish and is a bold move for those brave enough. 

Monday 23 January 2012

Heavanilli Massage Bar

I cannot believe LUSH has discontinued this massage bar! It was amazing to use as a moisturiser and as massage oils. It melts on contact with the skin and has a gorgeous vanilla / white chocolate / jasmine / cocoa butter smell which, being quite sweet, some smell as quite floral. It takes a while to sink in but you can use the LUSH vanilla powder to remove the excess oil if necessary. The price is £5.10 which can seem expensive, but it lasts for a long time and is glorious to use. If you can get your hands on any before it's all gone in the shops, get it!

INGREDIENTS: Cocoa Butter (Theobroma cacao), Fair Trade Shea Butter (Butyrospermum parkii), Extra Virgin Coconut Oil (Cocos nucifera), Perfume, Vanilla Absolute (Vanilla planifolia), Jasmine Absolute (Jasminum grandiflorum), Tonka Absolute (Dipteryx odorata), *Coumarin, Hydroxycitronellal, Gardenia Extract (Gardenia jasminoides), Colour 73360

Monday 16 January 2012

Andrea Fulerton Dot & Flick Nail Art: Black


The Andrea Fulerton Nail Boutique collection exclusively at Superdrug has really caught my attention. I decided to try my hand at a bit of nail art because I wanted to wear some leopard print, but not sure I'd get away with it on a piece of clothing. Answer: NAILS! I ordered the double-ended nail pen off Amazon because I couldn't go into town that week and it arrived in about 3 days. I couldn't wait to get started so I picked out a few colours which went together well (somebody requested pink nails so I chose pink for the background) and got started. I started with some OPI cuticle oil to prepare my nails and then used Boots' 17 Lasting Fix polish in 'Fairy Cake' as the background colour. 2 coats and then onto the next: a few spots on each nail of 17 Lasting Fix in 'Woo Me', some blobs of 17 Lasting Fix 'Mini Skirt' and a few dots of the limited edition MaxFactor Nailfinity polish in 'Boji'. After letting them dry completely, I started outlining each spot with the fine nib of the pen, not full circles, but broken rosettes like on a jaguar's coat. (Jaguar print is different from leopard print and I settled on jaguar.) This became way more difficult when I had to use my left hand to do my right hand, but I think it worked almost as well :) 
When the base coat chipped a few days later I used the pen to fix it up and it lasted about a week before I got bored and picked it all off (I also had to take the colour off because I had CCF the next day) I've loved this product so much, I went and bought the silver version, more news on that soon!

Sunday 15 January 2012

Saturday 14 January 2012

Radley Lansdown Collection


The gorgeous Lansdown Collection by Radley London features a regal inspired, dusty pink print on a black background. There are many pieces including a structured business card holder, cosmetic mirror, pencil case, wallet, blackberry and iPhone cases, purse etc. The print itself is the main selling point: it is exquisite. Some of the products show it off better than others however, such as the structured card holder and the make-up case. I found other pieces to be quite disappointing however: the scarf is not nice; it is made of a viscose/polyamide fabric which is a bit like velour and doesn't show off the print at all! At the original price of £69 this is simply not worth it. The blackberry case is very pretty and made out of nice soft leather, but unfortunately I have the Blackberry Torch which is a bit larger than the standard blackberry and mine just did not fit! The mirror however is perfect: lovely print on the front and a solid, brushed metal case. It is a perfect size for the handbag and has two mirrors on the inside, it also comes with a Radley dust cover to prevent damage when you are not using it.

Friday 13 January 2012

Shu Uemura "Natural" Radiant Blue False Eyelashes


On the left is the colour shown on the Shu Uemura website and which I expected them to turn up in the post as.. But they arrived the colour shown on the right! (not complaining) They have a gorgeous, magpie-like green sheen on the shorter lashes and lovely flares off to the outer side. Either way, however, they cannot be described as natural! (unless you're an Avatar.. Unlikely.)